
How to Build a Ground Level Deck: A Simple Step-by-Step Guide
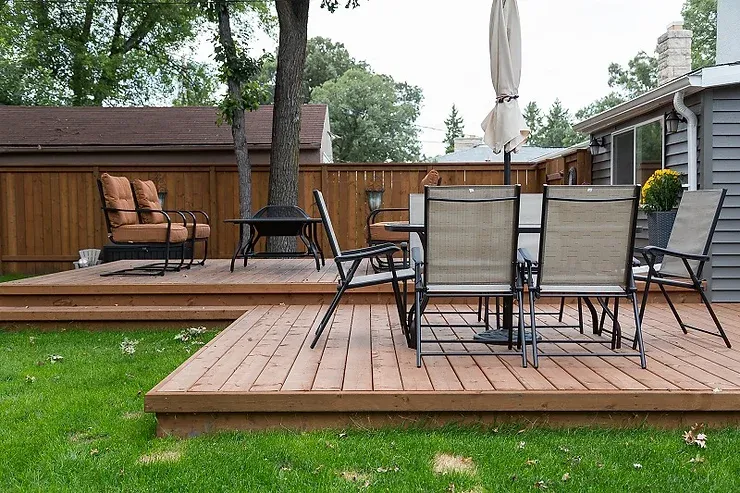
Imagine stepping out your back door onto a beautiful wooden deck where you can enjoy morning coffee, family barbecues, or quiet evening relaxation.
Sounds wonderful, doesn't it? If you've been dreaming about adding this feature to your home but worry about complex construction, we have good news!
Learning how to build a ground level deck is easier than you might think. Unlike elevated decks, ground level decks (those sitting 7 inches or less above grade) don't usually require railings or stairs, making them perfect for DIY homeowners.
In this guide, we'll walk you through simple, straightforward steps to create your own backyard oasis.
What You'll Need
Before grabbing your tools, let's make sure you have everything necessary for this project:
Tools:
Tape measure
Circular saw
Drill with bits
Level (4-foot recommended)
Square
String line
Shovel
Wheelbarrow
Tamper
Post hole digger or auger (for frost footings if needed)
Materials:
Pressure-treated lumber for framing (2×6 or 2×8 recommended)
Decking boards (pressure-treated, cedar, composite, etc.)
Deck screws (stainless steel recommended)
Gravel for drainage
Landscape fabric
Concrete blocks or pier blocks
Concrete mix (if using frost footings)
Joist hangers and hardware
According to Home Depot, materials for a basic 10×10 foot ground level deck typically cost between $700-$1,200, depending on the decking material you choose.
Planning Your Deck
The first (and most crucial) phase is proper planning:
Check local building codes. Call your local building department to learn about permits, setback requirements, and code specifications. Even ground level decks may require permits in some areas.
Mark your deck location. Use stakes and string to outline where you want your deck. Make sure it's square by measuring diagonally corner-to-corner (measurements should be equal).
Plan for drainage. The deck surface should slope away from your house at approximately 1/8 inch per foot to ensure proper water runoff, according to This Old House.
Create a materials list. Measure your outlined area and calculate how much lumber you'll need for framing and decking.
Site Preparation
Now let's get your ground ready:
Remove grass and topsoil. Clear all vegetation from your marked area, digging down about 6 inches.
Level the ground. Use a shovel and rake to create a flat surface, checking with your level as you go.
Add drainage material. Spread 3-4 inches of gravel over the entire area. This helps with drainage and prevents weeds.
Install landscape fabric. Cover the gravel with landscape fabric to further prevent weed growth.
According to Decks.com, proper site preparation is critical for preventing your deck from shifting and extending its lifespan.
Building the Frame
With preparation complete, it's time to build your deck frame:
Set your support blocks. Place concrete deck blocks around the perimeter and within the deck area, spacing them approximately 4 feet apart. Make sure they're level with each other.
Install the outer frame. Cut your pressure-treated 2×6 or 2×8 lumber to create the perimeter frame. Connect the corners using deck screws.
Square the frame. Double-check that your frame is square by measuring corner-to-corner diagonally.
Add joist hangers. Attach joist hangers to the inside of your perimeter boards where your joists will sit.
Install the joists. Cut your joists to size and secure them in the hangers, typically spaced 16 inches on center.
Add blocking between joists. For extra stability, add blocking (short pieces of the same lumber) between joists at the midpoint of your deck.
Installing Decking Boards
Now for the part that transforms your project into an actual deck:
Arrange your first board. Place your first decking board along one edge of the frame, leaving a 1/8-inch gap between boards for drainage and expansion.
Secure the board. Use two deck screws at each joist crossing. Pre-drilling can prevent splitting.
Continue adding boards. Work your way across the frame, using spacers between boards to maintain consistent gaps.
Check for straightness. Every few boards, measure from the end of the boards to the frame to ensure you're staying straight.
Trim the final board. The last board may need to be cut lengthwise to fit properly.
Finishing Touches
Let's complete your new deck:
Sand rough edges. Use sandpaper to smooth any rough areas or splinters.
Apply sealer or stain. If using natural wood (not composite), apply a weather-protective sealer or stain following the manufacturer's instructions. According to Consumer Reports, this step is crucial for extending the life of your deck.
Add skirting (optional). For a more finished look, you can add skirting around the perimeter to hide the frame and space underneath.
Once your deck is complete, many homeowners start thinking about shade options next — and is it cheaper to build or buy a pergola is one of the most common follow-up questions we hear. Building your own with basic lumber typically runs less upfront than a prefab kit, though a kit saves significant time and comes with pre-engineered plans that take the guesswork out of structural support.
Maintenance Tips
Keep your new deck looking great with these maintenance tips:
Clean regularly. Sweep debris and wash with appropriate deck cleaner at least twice yearly.
Re-seal annually. If using natural wood, apply new sealer or stain every 1-2 years.
Check for loose boards. Tighten any loose screws or replace damaged boards promptly.
Keep plants away. Avoid placing potted plants directly on the deck surface to prevent moisture damage and staining.
Conclusion
Congratulations! By following these steps, you've successfully learned how to build a ground level deck that will provide enjoyment for years to come.
This project may take a weekend or two, but the result is well worth the effort. Remember that proper planning, quality materials, and attention to detail are the keys to a sturdy, beautiful deck. Whether you're using it for entertaining friends, family meals, or simply relaxing with a good book, your new ground level deck will be a wonderful addition to your home that increases both its value and your quality of life.
Happy building!
If you're in Jacksonville or Columbus check our local service page for pricing

© 2026 | All Rights Reserved | Privacy Policy