
How to Build an Above Ground Deck: A Step-by-Step Guide
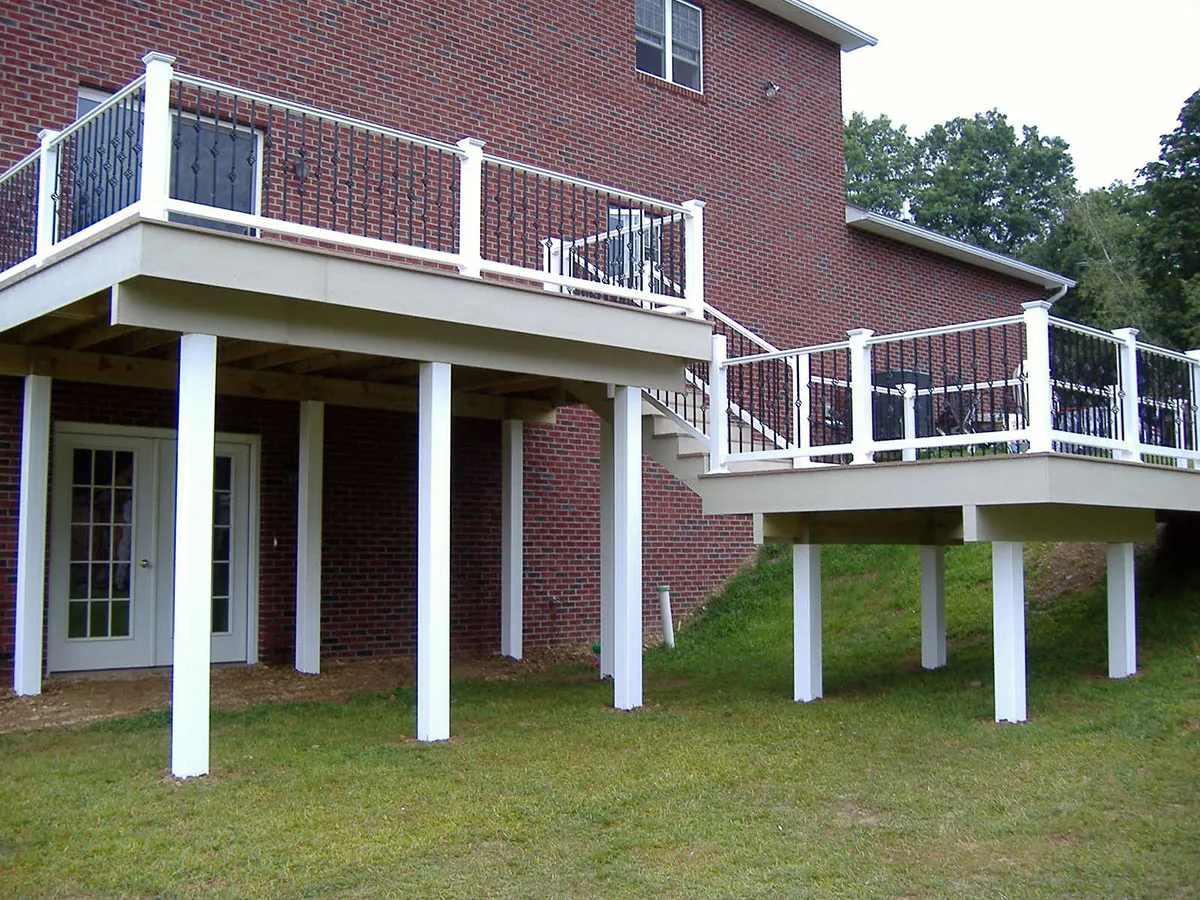
Imagine stepping out your back door onto a beautiful new deck where you'll enjoy summer barbecues, morning coffee, and starlit evenings with friends! Does that sound wonderful?
Building a deck might seem like a big challenge, but we promise it's something you can tackle with the right guidance. Learning how to build an above ground deck can be one of the most rewarding home projects you'll ever complete.
You'll not only save thousands of dollars compared to hiring professionals, but you'll also feel an amazing sense of pride every time you step onto your handcrafted outdoor space. Understanding the full cost to build a deck yourself — including materials, hardware, and tool rentals — helps you budget accurately before you ever break ground, so there are no surprises partway through the project.
Let's break down this project into simple, manageable steps that anyone can follow!
Tools and Materials You'll Need
Before starting any project, gathering all the right tools and materials is crucial. Here's what you'll need:
Tools:
Tape measure
Level (4-foot recommended)
Circular saw
Drill with bits
Hammer
Post hole digger or power auger
Shovel
Wheelbarrow
String line
Carpenter's square
Safety glasses and gloves
Materials:
Pressure-treated lumber for framing
Decking boards
Concrete mix
Deck screws and hardware
Galvanized metal brackets
Gravel for drainage
Wood sealer or stain
According to This Old House, using pressure-treated lumber rated for ground contact is essential for any parts of the deck that will be within 18 inches of soil.
Planning Your Above Ground Deck
The first (and most crucial) phase is proper planning:
Check local building codes. Contact your local building department to learn about permits, setbacks, and specific requirements.
Sketch your deck design. Draw a simple plan showing dimensions and features.
Mark your deck location. Use stakes and string to outline where your deck will go.
Call before you dig. Contact your utility companies to mark any underground lines. This is not just helpful – it's required by law in most places!
Site Preparation
Now let's get your ground ready:
Remove grass and topsoil. Clear all vegetation from your marked area, digging down about 6 inches.
Level the ground. Use a shovel and rake to create a flat surface, checking with your level as you go.
Add drainage material. Spread 3-4 inches of gravel over the entire area. This helps with drainage and prevents weeds.
Install landscape fabric. Cover the gravel with landscape fabric to further prevent weed growth.
The North American Deck and Railing Association recommends spending at least as much time planning your deck as you expect to spend building it.
According to Decks.com, proper site preparation is critical for preventing your deck from shifting and extending its lifespan.
Preparing the Site for Your Deck
Now let's get the ground ready for your new deck!
Clear the area of all plants, rocks, and debris.
Level the ground as much as possible where posts will go.
Mark your post hole locations based on your design, typically 6-8 feet apart.
Dig post holes below the frost line in your area (typically 30-48 inches deep) and about 12 inches in diameter.
Add gravel to the bottom of each hole for drainage (about 6 inches).
According to Popular Mechanics, proper site preparation can prevent up to 90% of common deck problems down the road.
Installing Decking Boards
Now for the part that transforms your project into an actual deck:
Arrange your first board. Place your first decking board along one edge of the frame, leaving a 1/8-inch gap between boards for drainage and expansion.
Secure the board. Use two deck screws at each joist crossing. Pre-drilling can prevent splitting.
Continue adding boards. Work your way across the frame, using spacers between boards to maintain consistent gaps.
Check for straightness. Every few boards, measure from the end of the boards to the frame to ensure you're staying straight.
Trim the final board. The last board may need to be cut lengthwise to fit properly.
Setting Support Posts
Strong posts create a solid foundation for your deck. Here's how to set them right:
Cut your posts to the correct height plus the depth of your holes.
Place posts in holes on top of the gravel.
Check that posts are plumb (perfectly vertical) using your level.
Brace the posts temporarily with 2x4s nailed to stakes in the ground.
Mix concrete according to package directions.
Pour concrete around posts, filling holes to about 3 inches below ground level.
Recheck that posts are plumb before concrete sets.
Allow concrete to cure for at least 24-48 hours before continuing.
The American Wood Council emphasizes that proper post installation is critical for deck safety and longevity.
Building the Deck Frame
Now for the framework that will support your deck boards:
Mark the height of your deck on the posts.
Cut posts to the proper height if you haven't already.
Attach the ledger board to your house using lag screws or through-bolts if your deck connects to the building.
Install rim joists around the outside perimeter, attaching them to the posts.
Add support beams between posts with metal brackets.
Install floor joists typically 16 inches apart, running from the ledger to the rim joist.
Add blocking between joists for extra stability.
Double-check that your frame is level and square before proceeding.
The Family Handyman notes that properly spacing joists (16 inches on center for most decking) is crucial for a sturdy, long-lasting deck.
Installing Decking Boards
Now for the framework that will support your deck boards:
Let your decking material acclimate to the outdoor environment for a few days.
Start at the edge against the house and work outward.
Leave a small gap (about 1/8 inch) between boards for drainage.
Use two deck screws at each joist crossing.
Keep checking your lines to ensure boards remain straight.
Use a string line as a guide for longer runs.
Cut the ends flush once all boards are installed.
According to Consumer Reports, leaving proper spacing between decking boards prevents water damage and extends the life of your deck.
Adding Finishing Touches
These final steps transform your project from a platform to a beautiful outdoor living space:
Add fascia boards around the perimeter to hide the framing.
Build stairs if needed (this may require additional planning).
Install railings if your deck is more than 30 inches off the ground (check local codes for requirements).
Apply sealer or stain to protect the wood from weather damage.
Add lighting, planters, or built-in seating for extra functionality.
Better Homes & Gardens recommends railing heights of 36-42 inches for most residential decks, depending on local building codes.
Safety Tips for Building an Above Ground Deck
Safety should always come first when learning how to build a above ground deck:
Wear safety gear including glasses, gloves, and sturdy shoes.
Have a helper for lifting heavy materials.
Use power tools safely and according to manufacturer instructions.
Keep your work area clean to prevent trips and falls.
Check lumber for splinters, cracks, or warping before installation.
Double-check all connections to ensure they're secure.
The Occupational Safety and Health Administration emphasizes the importance of proper safety procedures during all phases of construction.
Conclusion
Building a deck is a wonderful way to extend your living space and add value to your home. While it takes time and effort, the step-by-step process we've outlined makes how to build an above ground deck an achievable project for dedicated DIYers. Just remember to plan carefully, check local codes, use quality materials, and take your time with each step. Before you know it, you'll be enjoying summer evenings on your beautiful new deck – one that you built with your own hands! Isn't that something to be proud of?
If you're in Portland or Spokane check our local service page for pricing

© 2026 | All Rights Reserved | Privacy Policy